In this article we’re going to walk you through how to edit your website header in Elementor. Feel free to also watch the video below and pause when needed for better understanding. Let’s get started!
What Is a Header?
Many times the header of your site is where contact information will be displayed such as phone numbers, emails addresses, etc. If you ever need to update these things, you have the option to do it yourself saving you both time and money. Just follow these easy steps!

1) Login to your WordPress dashboard
In order to access your WordPress dashboard, you’ll need to go to your website and type “/wp-admin” at the end of your URL. Example: ‘website.com’ — ‘website.com/wp-admin’
Here you will be taken to the login page requesting your username and password. Here you can use the login credentials provided to you.
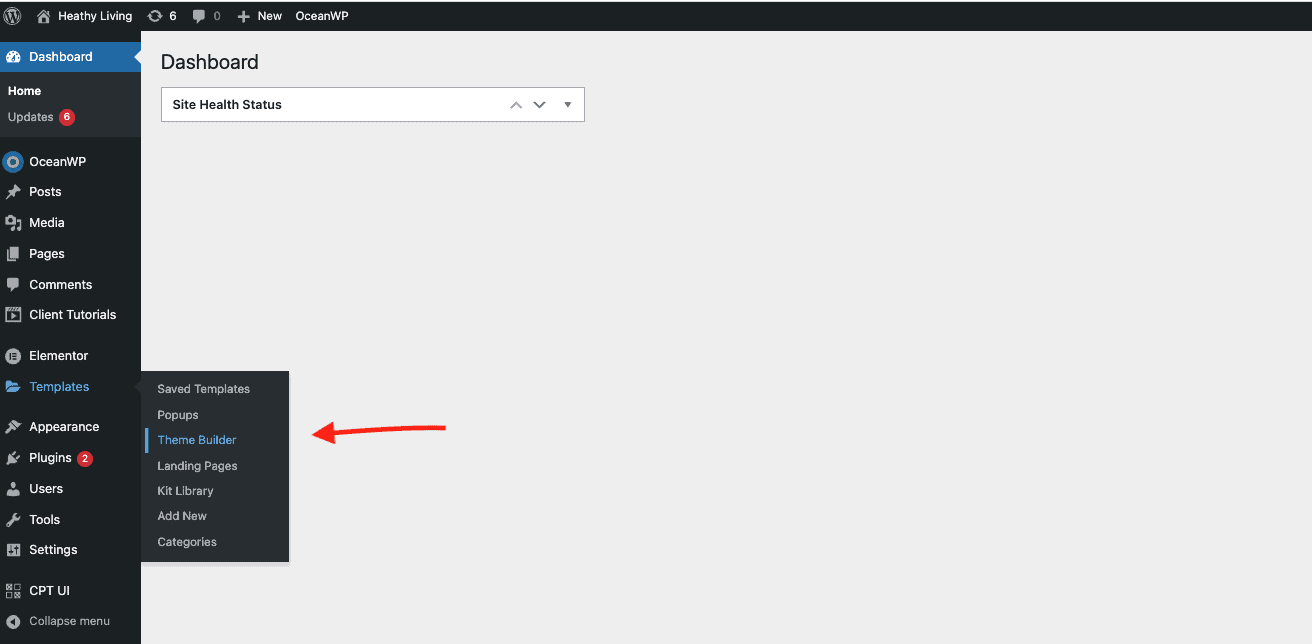
2) Navigate to ‘Templates’ > ‘Theme Builder’ in the left column
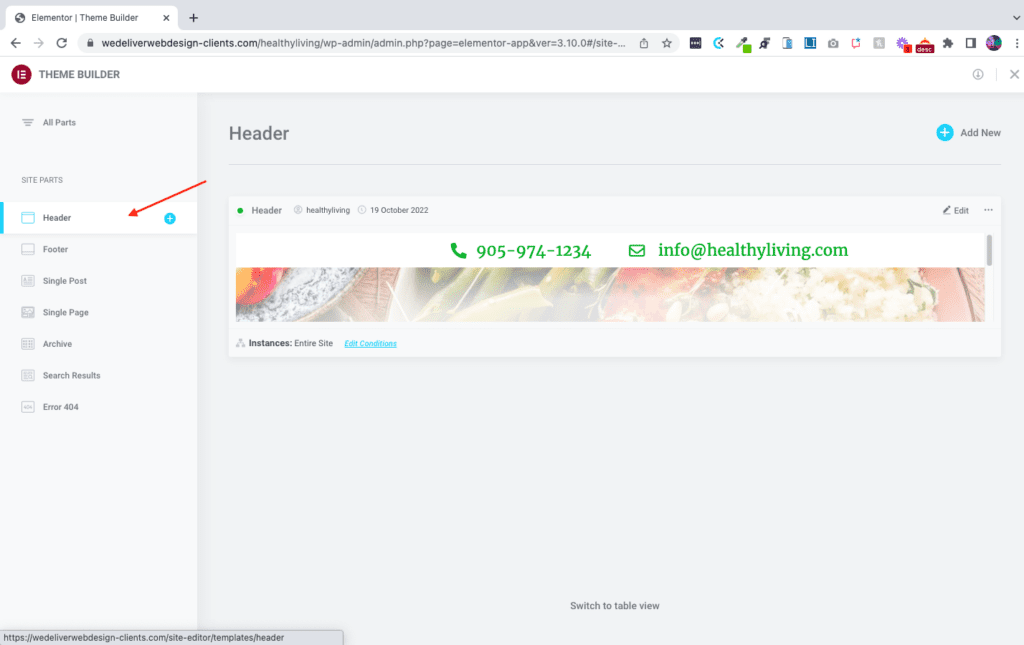
3) Navigate to ‘Header’ in the left column and select ‘Edit’
If you have multiple headers, ensure you are selecting the right one to edit.
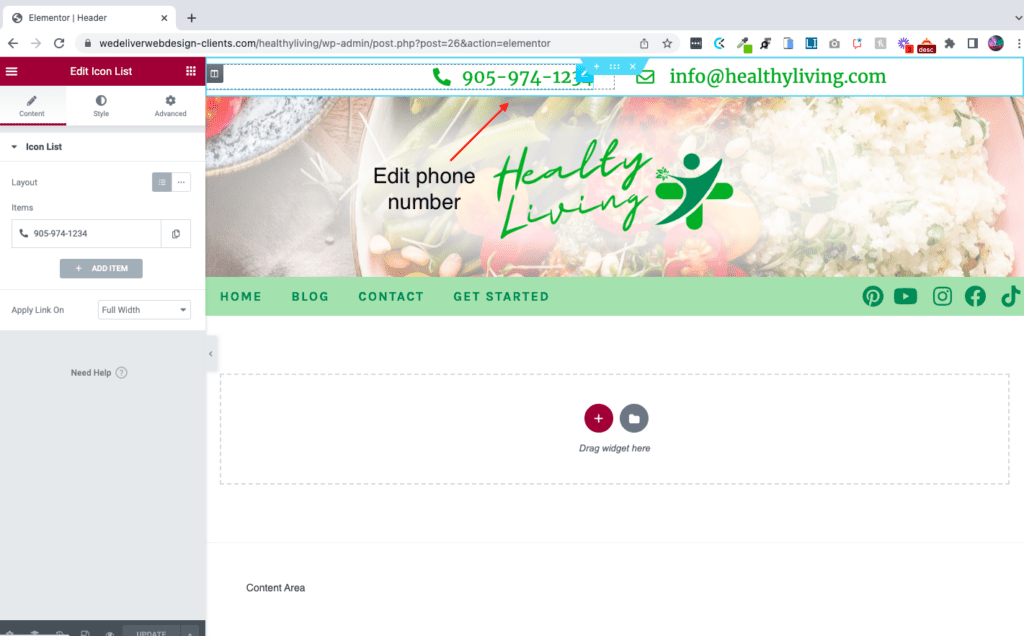
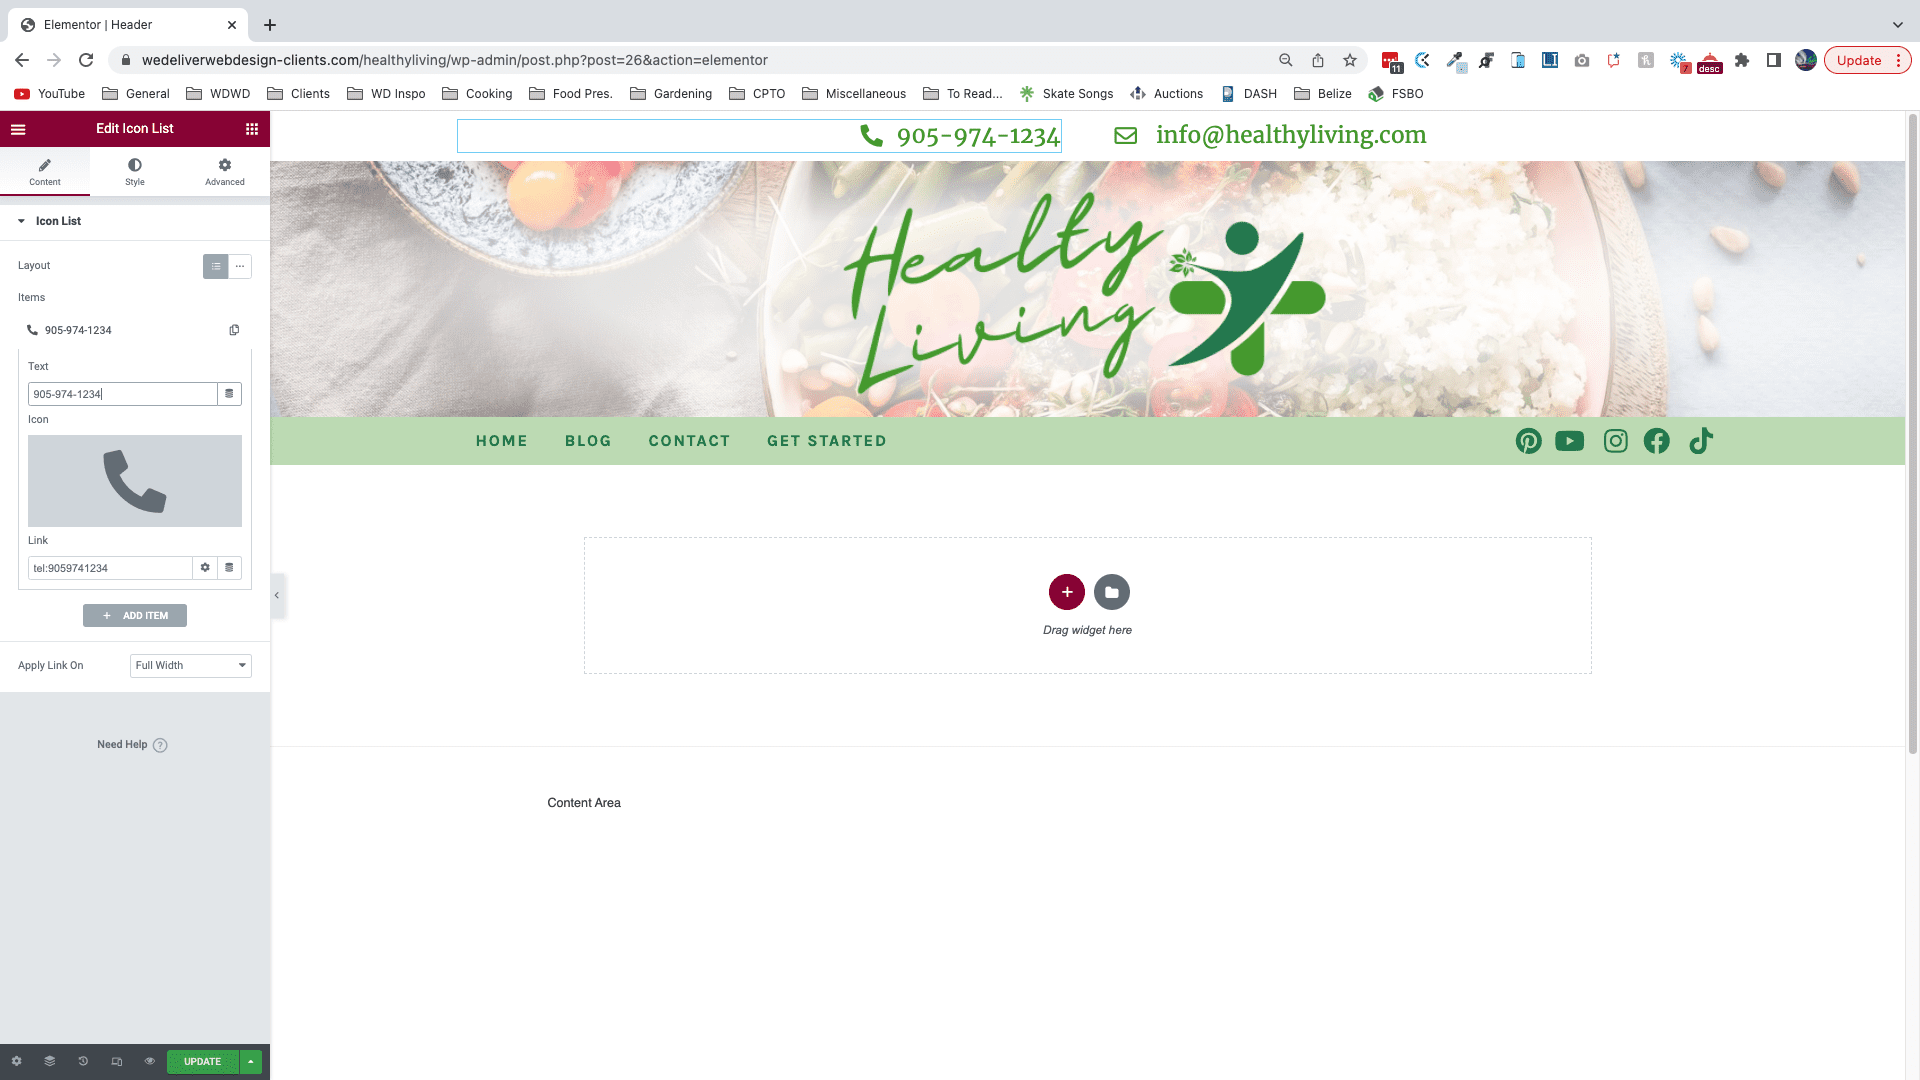
4) Click on the element you wish to edit, then make your changes
Your editing options are displayed in the left column (content, style, and advanced). Play around with these options to find which part you wish to edit.
5) Update
Once you have finished making your changes, click on the ‘update’ button at the bottom. Make sure to wait until the page is finished updating before you reload or exit the page.
That’s all there is to it! Now you can view your changes on your website.